Planting the Tree
Once you’ve chosen your pot and lemon tree, it’s time to plant.
- Prepare the Pot:
- Fill the pot with a well-draining potting mix. Citrus trees prefer slightly acidic soil with good drainage, so look for a mix designed for citrus or create your own with compost, sand, and peat moss.
- Plant the Tree:
- Gently remove the lemon tree from its nursery pot, being careful not to damage the roots.
- Place the tree in the center of the pot, making sure it sits at the same depth it was planted in its original pot.
- Fill in around the tree with more potting mix, pressing lightly to eliminate air pockets.
Watering and Initial Care
- Watering: After planting, water the tree thoroughly to settle the soil. Ensure the pot drains well to avoid root rot.
- Location: Place the pot in a sunny spot where the tree will receive at least 6-8 hours of direct sunlight each day.
🌞 Sunlight Tip: If growing indoors, place the tree near a south-facing window or use grow lights to supplement natural light.
Part 3: Ongoing Care and Maintenance
Watering and Feeding
Lemon trees in pots require regular watering and feeding to thrive.
- Watering: Water when the top 2-3 inches of soil feel dry. During hot weather, you may need to water more frequently.
- Fertilizing: Feed the tree with a citrus-specific fertilizer every 4-6 weeks during the growing season (spring through summer). Reduce feeding in the fall and winter when the tree’s growth slows.
Pruning and Shaping
Pruning helps maintain the tree’s shape and encourages healthy growth.
- When to Prune: Prune in late winter or early spring before new growth begins.
- How to Prune: Remove any dead or diseased branches, and thin out the center of the tree to allow light and air to reach all parts.
✂️ Pruning Tip: Regular pruning also prevents the tree from becoming too top-heavy, which is important for potted trees that can easily tip over.
Part 4: Dealing with Pests and Diseases
Common Pests
Potted lemon trees can be susceptible to pests such as aphids, spider mites, and scale insects.
- Aphids: Small, soft-bodied insects that cluster on new growth. Spray them off with water or use insecticidal soap.
- Spider Mites: Tiny pests that cause stippling on leaves. Increase humidity around the tree and treat with miticide if necessary.
- Scale Insects: Hard, shell-like insects on stems and leaves. Remove by hand or use horticultural oil.
Diseases
- Root Rot: Caused by overwatering. Ensure proper drainage and avoid letting the pot sit in water.
- Citrus Canker: A bacterial disease that causes lesions on leaves and fruit. Remove and destroy affected parts, and apply copper-based fungicide if needed.
🛡️ Prevention Tip: Regularly inspect your tree for signs of pests or disease and address issues promptly to keep your tree healthy.
Part 5: Harvesting and Enjoying Your Lemons
When to Harvest
Lemons are ready to harvest when they reach full color and size for their variety. The fruit should be firm but give slightly under pressure.
- Meyer Lemons: Usually ripen in the winter and have a deep yellow color.
- Eureka Lemons: Ripen throughout the year, turning bright yellow when ready.
How to Harvest
- Use sharp pruning shears to cut the fruit from the tree, leaving a small stem attached to the lemon to prolong freshness.
🍋 Harvest Tip: For the best flavor, allow the lemons to fully ripen on the tree before picking.
Conclusion: A Bountiful Harvest Awaits
With the right care, your potted lemon tree can produce an abundance of fresh, juicy lemons year after year. By choosing the right variety, planting it properly, and maintaining it with regular watering, feeding, and pruning, you’ll enjoy the fruits of your labor in no time.
Why Grow Lemons in Pots?
- Space-Saving: Perfect for small spaces like patios, balconies, or even indoors.
- Control: Easier to manage watering, feeding, and pests in a controlled environment.
- Year-Round Harvest: With the right variety and care, you can enjoy fresh lemons all year long.
Embrace the joy of growing your own citrus and look forward to bountiful harvests from your thriving potted lemon tree! 🌿🍋
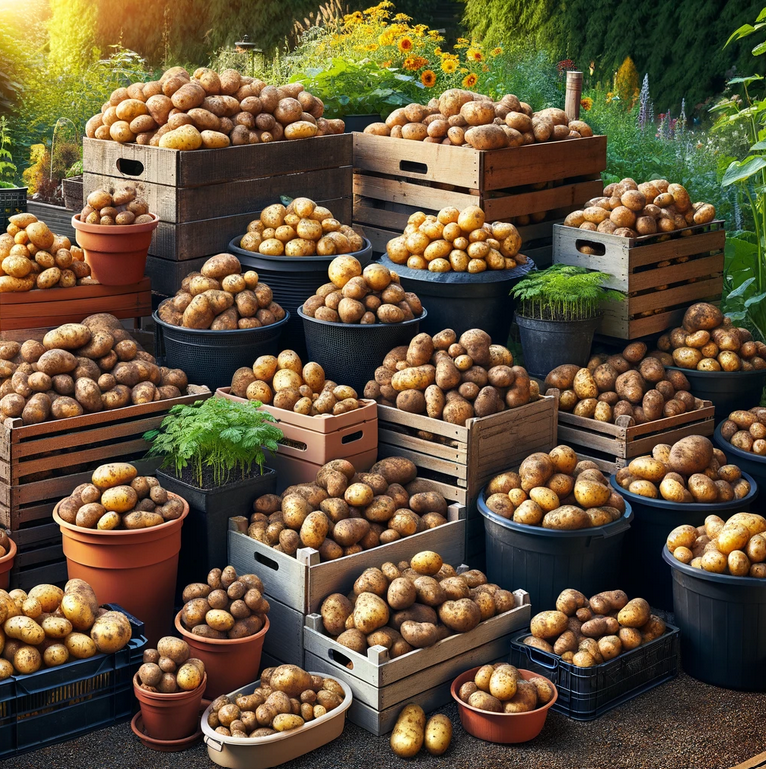
Grow Potatoes in Containers at Home with Just One Potato

Did you know that you can grow delicious potatoes right in the comfort of your own home, using just one potato as a starter? Whether you have a spacious backyard or a small balcony, container gardening offers a simple and rewarding way to enjoy fresh, homegrown produce. In this guide, we’ll walk you through the step-by-step process of growing potatoes in containers, from selecting the right potato to harvesting your bountiful crop.
Selecting the Right Potato: To get started, you’ll need to choose a potato variety suitable for container gardening. Look for seed potatoes (potatoes specifically grown for planting) at your local garden center or nursery. Opt for varieties that are well-suited to container growing, such as Yukon Gold, Red Pontiac, or Fingerling potatoes.
Preparing the Container: Select a large, sturdy container with adequate drainage holes to prevent waterlogged soil. Half-barrels, grow bags, or large plastic pots are excellent options for growing potatoes. Fill the container with a nutrient-rich potting mix, leaving enough room to accommodate the potato plant as it grows.
Planting the Potato: Begin by preparing the seed potato for planting. If the potato has sprouted “eyes” (small buds), cut it into sections, ensuring that each section contains at least one eye. Allow the cut sections to air dry for a day or two to prevent rotting. Once dried, plant the potato sections in the prepared container, burying them about 4 inches deep and spacing them 8-10 inches apart.
Caring for Your Potato Plant: Place the container in a sunny location where the potato plant will receive at least 6-8 hours of sunlight per day. Keep the soil consistently moist but not waterlogged, as overwatering can cause the potatoes to rot. As the potato plant grows, continue to mound soil around the base of the plant to encourage tuber formation and protect developing potatoes from sunlight, which can turn them green and bitter.
Harvesting Your Potatoes: After several weeks, your potato plant will begin to flower, indicating that tubers are forming beneath the soil. Once the foliage starts to yellow and die back, it’s time to harvest your potatoes. Carefully dig around the base of the plant to unearth the potatoes, being careful not to damage them. Harvest potatoes as needed, or wait until the entire crop is ready for harvest.
Enjoying Your Homegrown Potatoes: Congratulations! You’ve successfully grown potatoes in containers at home with just one potato. Whether you roast them, mash them, or enjoy them in a hearty potato salad, there’s nothing quite like the taste of freshly harvested, homegrown potatoes. Get creative in the kitchen and savor the fruits of your labor.
Growing potatoes in containers at home is a fun and rewarding gardening project that anyone can enjoy, regardless of space limitations. With just one potato as a starter, you can harvest a bountiful crop of delicious potatoes right from your own backyard or balcony. So why wait? Grab a potato, grab a container, and get growing today!


