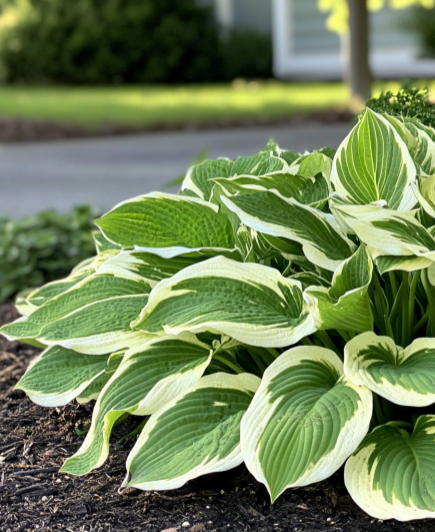
Hostas, often hailed as the queens of the shade garden, are prized for their beautiful, lush foliage and wide variety of forms. Fall is a critical season for hosta care, setting the stage for next year’s growth and ensuring that these perennial favorites not only survive the winter but also thrive come spring. In this comprehensive guide, we’ll cover five essential practices to achieve the healthiest and most vigorous hostas. From selecting the perfect planting location to proper fertilization, each step plays a vital role in the development and longevity of your hostas.
Understanding Hostas and Their Needs
Before diving into specific care techniques, it’s essential to understand the basic needs of hostas. Native to Northeast Asia, hostas thrive in shaded environments with ample moisture and prefer USDA hardiness zones 3 through 9. They are known for their affinity for well-drained, rich soil and benefit greatly from regular feeding and watering. Understanding these basic requirements will help you make informed decisions about fall care for your hostas.
Key Needs of Hostas:
- Shade and Moisture: Hostas perform best in shaded or partially shaded areas with plenty of moisture.
- Ideal Soil Conditions: They prefer well-drained, fertile soil that is slightly acidic to neutral (pH 6.0-7.0).
- Hardiness Zones: Hostas thrive in USDA zones 3-9, making them versatile for many regions.
1. Choosing the Right Location for Planting
The location where hostas are planted plays a crucial role in their growth and development. Hostas prefer shaded or partially shaded areas, as direct sunlight can scorch their delicate leaves. When choosing a planting site, look for areas that receive morning sun and afternoon shade. The morning sun provides gentle light, while the afternoon shade protects the leaves from scorching.
Location Tips:
- Morning Sun, Afternoon Shade: This combination helps hostas maintain their vibrant foliage.
- Avoid Waterlogged Areas: Ensure the planting site is not prone to waterlogging, as excessive moisture can lead to root rot.
- Sheltered Spots: Plant hostas near structures or under trees where they are sheltered from harsh weather conditions.
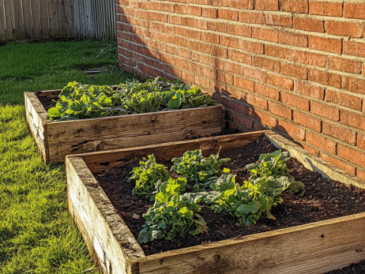
2. Soil Preparation and Conditioning
Preparing the soil is one of the most critical steps in ensuring vigorous growth for your hostas. The right soil conditions will promote strong root development, leading to healthier plants.
Steps for Soil Preparation:
- Test Soil pH: Hostas thrive in slightly acidic to neutral soil, ideally between 6.0 and 7.0. Testing your soil’s pH can help you adjust it if necessary.
- Incorporate Organic Matter: Add plenty of organic matter such as compost, leaf mold, or well-rotted manure. This enriches the soil, improves drainage, and enhances moisture retention.
- Loosen the Soil: Till or loosen the soil to a depth of 12-18 inches. This allows for proper root expansion and better access to nutrients.
Soil Conditioning Tips:
- Amend Clay Soils: If your soil is heavy clay, consider adding sand or fine grit along with organic matter to improve drainage.
- Maintain Fertility: A nutrient-rich soil base will help your hostas flourish, especially if amended with compost annually.
3. Watering Techniques and Requirements
Proper watering is vital for hosta health, particularly during the fall as they prepare for dormancy. Consistent moisture helps hostas store the energy they need to emerge strong in the spring.
Best Watering Practices:
- Deep Watering: Water deeply and thoroughly, ensuring the soil remains consistently moist but not waterlogged.
- Adjust Watering as Temperatures Drop: Gradually reduce the frequency of watering as the weather cools, but do not let the soil dry out completely.
- Mulch to Retain Moisture: Applying mulch helps retain soil moisture, keeps roots cool, and protects against fluctuating temperatures.
Tips for Effective Watering:
- Water Early in the Day: Watering in the morning allows foliage to dry off during the day, reducing the risk of fungal diseases.
- Avoid Wetting the Leaves: Focus on watering the base of the plants rather than wetting the leaves to prevent leaf spots and other moisture-related issues.
4. Fertilizing for Optimal Growth
Fertilizing your hostas in the fall can significantly impact their growth and health in the following season. Proper nutrition ensures that your hostas have the energy and nutrients needed to develop strong roots.
Fertilization Tips:
- Use Balanced, Slow-Release Fertilizer: A balanced, slow-release fertilizer will provide essential nutrients over time without encouraging excessive new growth that might not withstand winter conditions.
- Top Dress with Compost: Alternatively, top dressing with compost or organic material can enrich the soil naturally as it breaks down, providing a gentle, slow nutrient release.
- Avoid High-Nitrogen Fertilizers: High-nitrogen fertilizers can promote tender new growth late in the season, which is vulnerable to frost damage.
5. Pest and Disease Management
Fall is a critical time to address any pest and disease issues that could affect your hostas. Slugs, snails, and fungal diseases are common problems that, if left unchecked, can damage plants and hinder their growth.
Managing Pests and Diseases:
- Control Slugs and Snails: Use organic slug pellets, diatomaceous earth, or copper tape around your hostas to deter these common pests.
- Clean Up Debris: Removing dead leaves and other garden debris helps prevent fungal spores and pests from overwintering near your hostas.
- Monitor for Disease: Inspect your hostas for signs of disease, such as leaf spots or rot, and remove any affected foliage promptly.
Mulching to Protect and Nourish
Applying mulch in the fall offers multiple benefits: it insulates the soil, helps retain moisture, and adds organic material as it decomposes, enriching the soil.
Mulching Tips:
- Use Organic Mulch: Materials like shredded bark, leaves, or straw work well to protect hostas during the winter.
- Apply 2-3 Inches of Mulch: A layer about 2-3 inches thick will protect the roots and help maintain consistent soil conditions.
- Keep Mulch Away from Stems: Avoid piling mulch directly against the stems to prevent rot and ensure good air circulation.
Conclusion
Caring for hostas in the fall involves strategic practices that collectively contribute to their health and growth. By choosing the right location, preparing the soil properly, ensuring adequate watering, applying the right fertilizers, managing pests and diseases, and mulching, you are setting the stage for your hostas to thrive. Implement these steps to enjoy lush, robust hostas that will be the pride of your garden next season. With a bit of attention and care, your hostas will reward you with their stunning foliage and vigorous growth year after year.