Imagine turning a handful of store-bought peanuts into a thriving peanut plant right in your backyard. It might sound like a fun science experiment, but it’s entirely possible! Growing peanuts from store-bought nuts is a rewarding and surprisingly easy process that brings the farm to your home garden. Whether you’re an experienced gardener or a curious beginner, this guide will walk you through every step of the journey—from selecting the right peanuts to harvesting your crop. Ready to dig in?
Part 1: Getting Started – From Snack to Seedling
1. Choosing the Right Peanuts
Not all peanuts are created equal, especially when it comes to planting. Here’s what you need to know:
- Raw and Unroasted: To grow peanuts, you need to start with raw, unroasted peanuts. Roasting destroys the seed’s viability, so make sure the peanuts you choose are still in their natural state.
- Shell On or Off: Peanuts can be planted with the shell on or off, but most gardeners prefer to remove the shell to ensure quicker germination. However, leave the thin, papery coating on the nut, as it protects the seed.
- Source: While you can use peanuts from a store, make sure they are organic to avoid any treatments that could prevent germination. You might also find seeds labeled as “seed peanuts” in gardening stores.
🌱 Tip: If you’re unsure, test a few peanuts first by soaking them in water overnight and then planting them in a small pot. If they sprout, you’re good to go!
2. Preparing the Soil for Peanut Planting
Peanuts love loose, well-draining soil with a slightly sandy texture. Here’s how to prepare your garden or pots:
- Soil Mix: If your garden soil is heavy clay or very compacted, amend it with sand and organic matter like compost to create a looser texture. Peanuts need well-draining soil to thrive.
- pH Level: Peanuts prefer a slightly acidic to neutral pH, around 5.8 to 6.5. You can test your soil with a home kit and adjust it if necessary using lime or sulfur.
- Sunlight: Choose a location that gets full sunlight for at least 6 hours a day. Peanuts are sun-loving plants and need plenty of warmth to grow.
🌞 Sun Tip: If you’re growing peanuts in containers, make sure they’re placed in a spot where they’ll receive maximum sunlight.
3. Planting the Peanuts – A Step-by-Step Guide
Once your soil is ready, it’s time to plant your peanuts:
- Timing: Peanuts are warm-weather plants, so wait until all danger of frost has passed and the soil temperature is at least 65°F (18°C). In most regions, this is late spring to early summer.
- Planting Depth: Plant peanuts about 2 inches deep in the soil, spacing them about 6-8 inches apart. If planting in rows, space the rows about 24 inches apart to give the plants room to spread.
- Cover Lightly: Lightly cover the seeds with soil, ensuring they’re not buried too deep. Water them gently after planting.
🪴 Container Tip: If you’re growing peanuts in pots, choose a container that’s at least 12 inches deep to accommodate the roots and developing peanut pods.
Ready to see your peanuts sprout and grow? Keep reading as we dive into nurturing your plants and ensuring a bountiful harvest in Page 2!
Part 2: Nurturing and Harvesting Your Peanut Crop
Part 2: Nurturing and Harvesting Your Peanut Crop
4. Caring for Your Peanut Plants
Now that your peanuts are planted, it’s time to care for them as they grow:
- Watering: Peanuts need consistent moisture, especially during the flowering and pod development stages. Water the plants regularly, but avoid overwatering as soggy soil can lead to root rot.
- Mulching: Apply a layer of mulch around your peanut plants to help retain soil moisture and suppress weeds. Straw, grass clippings, or shredded leaves work well.
- Fertilizing: Peanuts are legumes, which means they fix their own nitrogen from the air, so they don’t need much nitrogen fertilizer. However, a balanced fertilizer with phosphorus and potassium can help promote healthy growth.
💧 Watering Tip: Water deeply but infrequently to encourage deep root growth, which will help the plants access moisture during dry periods.
5. Understanding Peanut Growth Stages
Peanuts are unique in that they flower above ground but develop their pods underground. Here’s what to expect:
- Flowering: Peanuts produce small yellow flowers about 30-40 days after planting. These flowers will self-pollinate and then form a peg that grows down into the soil where the peanut pods will develop.
- Pod Development: The pegs burrow into the soil, where the peanut pods begin to form. This process takes several weeks, and during this time, it’s crucial to keep the soil moist.
- Growth Time: Peanuts typically take 120-150 days from planting to harvest, depending on the variety and growing conditions.
🌼 Flowering Tip: Be patient during the flowering stage—this is a critical time for pod formation, so make sure your plants have all the nutrients and moisture they need.
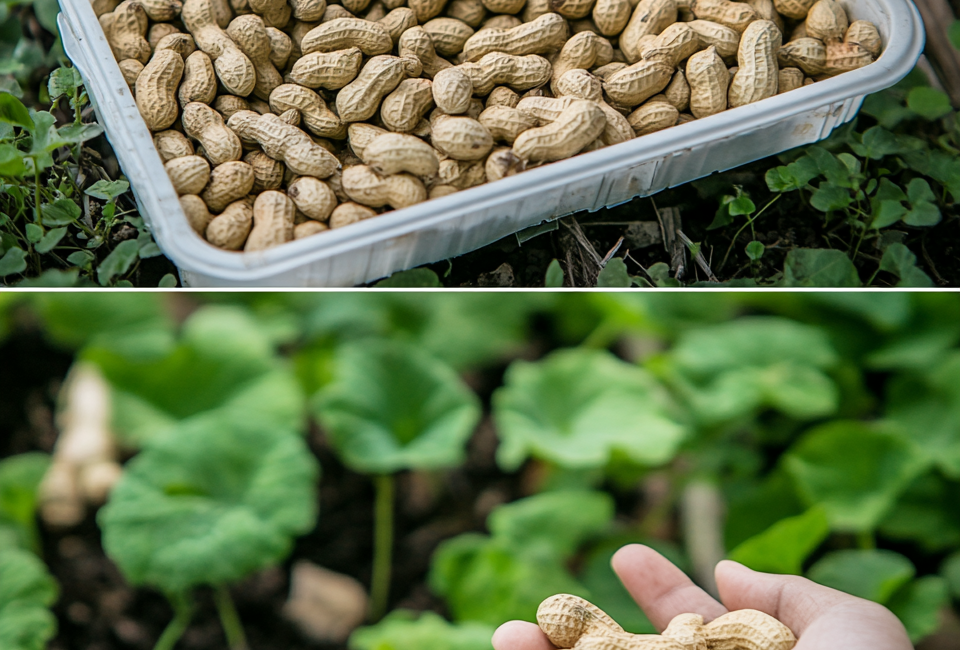
6. Harvesting Your Homegrown Peanuts
The moment you’ve been waiting for—harvesting your peanuts!
- Timing: Harvest when the leaves of the peanut plant begin to yellow and wither. This usually occurs in late summer to early fall.
- Digging Up the Peanuts: Carefully loosen the soil around the base of the plant with a garden fork, then gently lift the entire plant. You should see peanut pods clinging to the roots.
- Drying: After harvesting, let the peanut plants dry in a warm, dry place for a few days. This curing process helps improve the flavor and texture of the peanuts.
- Shelling: Once the plants are dry, you can shell the peanuts by hand and enjoy them roasted, boiled, or even raw!
🥜 Harvest Tip: To get the best flavor from your peanuts, roast them in the oven at 350°F for about 15-20 minutes after drying.
7. Storing Your Harvest and Preparing for Next Season
After enjoying your homegrown peanuts, you can store or prepare for another round of planting:
- Storage: Store shelled peanuts in an airtight container in a cool, dry place. They can last several months when stored properly.
- Saving Seeds: If you want to grow peanuts again next season, save some of the best-looking pods to use as seeds. Store them in a cool, dry place until planting time.
🌱 Seed Saving Tip: Choose the largest and healthiest peanuts to save as seeds, as they will likely produce the strongest plants.
Conclusion: From Store-Bought Snack to Homegrown Delight
Growing peanuts from store-bought nuts is a fun and rewarding way to bring a piece of the farm into your backyard. With the right preparation, care, and patience, you can enjoy a bountiful harvest of fresh, homegrown peanuts. Whether you’re planting in a garden or a container, this guide has given you all the tools you need to succeed.
So why wait? Grab some peanuts and start your gardening adventure today—your future self will thank you for the delicious, homegrown rewards!