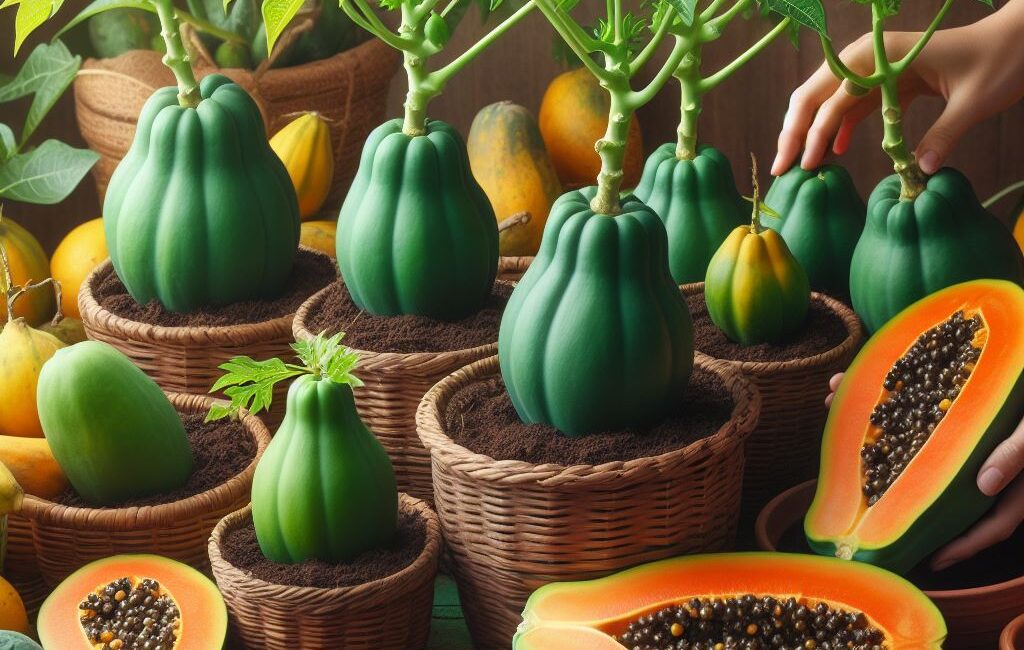
Get ready to revolutionize your gardening game with a secret that’s been hiding in plain sight: container gardening for papayas! Imagine stepping out onto your balcony or patio to pluck ripe, juicy papayas straight from your own mini tropical paradise. In this viral guide, we’re diving deep into the world of container gardening, unlocking the key to a never-ending supply of delicious papayas right at your fingertips.
Step 1: Selecting the Perfect Container The first step on your journey to papaya perfection is choosing the ultimate container. Forget cramped garden beds – we’re talking spacious, sturdy pots that give your papaya roots room to roam. We’ll reveal the insider tips for selecting the ideal pot size and material to ensure your papaya tree thrives and flourishes.
Step 2: Finding the Sweet Spot Location, location, location! Discover the secret sauce for positioning your papaya container in the prime spot for maximum sunlight and optimal growth. We’ll spill the beans on creating the perfect microclimate for your papaya tree to thrive, whether you’re a city dweller or suburban gardener.
Step 3: Crafting the Ultimate Potting Mix Ready to mix it up? We’re revealing the recipe for the ultimate papaya potting mix – one that’s guaranteed to nourish your tree from root to fruit. Say goodbye to guesswork and hello to a nutrient-rich blend that will have your papaya tree singing with delight.
Step 4: Planting Papaya Magic It’s time to get your hands dirty! Whether you’re starting from seeds or snagging seedlings, we’ve got you covered with foolproof planting techniques that will have your papaya tree sprouting in no time. From seed to sapling, we’ll guide you every step of the way.
Step 5: TLC – Tender Loving Care Like any relationship, growing papayas in containers requires a little TLC. But fear not – we’ll share the insider secrets for keeping your papaya tree happy and healthy, from watering wisdom to fertilizer finesse. Plus, we’ll spill the tea on pest control and disease prevention to ensure your papayas stay pristine.
Step 6: Watching the Magic Happen Get ready for the moment of truth – fruiting time! We’ll walk you through the exhilarating process of watching your papaya tree burst into bloom and set fruit. With our expert tips on thinning, pruning, and nurturing, you’ll be amazed at the abundance of papayas cascading from your container oasis.
Step 7: Harvesting the Bounty The moment you’ve been waiting for – harvest time! We’ll show you how to know when your papayas are ripe for the picking and share creative ways to enjoy the fruits of your labor. From mouthwatering smoothies to tantalizing tropical salads, the possibilities are endless with your homegrown papaya harvest.
Say goodbye to grocery store papayas and hello to a lifetime supply of homegrown bliss! With the secrets of container gardening at your fingertips, you’ll unlock a world of flavor and freshness right outside your door. Join the viral gardening revolution and start growing your own papayas today – your taste buds will thank you! 🌴🥭✨
Grow Potatoes in Containers at Home with Just One Potato
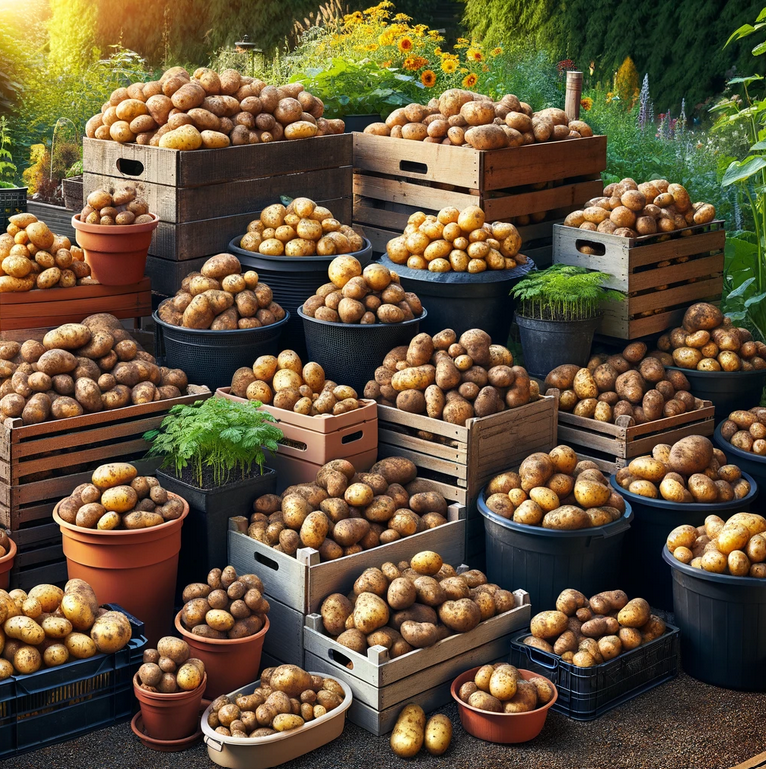
Did you know that you can grow delicious potatoes right in the comfort of your own home, using just one potato as a starter? Whether you have a spacious backyard or a small balcony, container gardening offers a simple and rewarding way to enjoy fresh, homegrown produce. In this guide, we’ll walk you through the step-by-step process of growing potatoes in containers, from selecting the right potato to harvesting your bountiful crop.
Selecting the Right Potato: To get started, you’ll need to choose a potato variety suitable for container gardening. Look for seed potatoes (potatoes specifically grown for planting) at your local garden center or nursery. Opt for varieties that are well-suited to container growing, such as Yukon Gold, Red Pontiac, or Fingerling potatoes.
Preparing the Container: Select a large, sturdy container with adequate drainage holes to prevent waterlogged soil. Half-barrels, grow bags, or large plastic pots are excellent options for growing potatoes. Fill the container with a nutrient-rich potting mix, leaving enough room to accommodate the potato plant as it grows.
Planting the Potato: Begin by preparing the seed potato for planting. If the potato has sprouted “eyes” (small buds), cut it into sections, ensuring that each section contains at least one eye. Allow the cut sections to air dry for a day or two to prevent rotting. Once dried, plant the potato sections in the prepared container, burying them about 4 inches deep and spacing them 8-10 inches apart.
Caring for Your Potato Plant: Place the container in a sunny location where the potato plant will receive at least 6-8 hours of sunlight per day. Keep the soil consistently moist but not waterlogged, as overwatering can cause the potatoes to rot. As the potato plant grows, continue to mound soil around the base of the plant to encourage tuber formation and protect developing potatoes from sunlight, which can turn them green and bitter.
Harvesting Your Potatoes: After several weeks, your potato plant will begin to flower, indicating that tubers are forming beneath the soil. Once the foliage starts to yellow and die back, it’s time to harvest your potatoes. Carefully dig around the base of the plant to unearth the potatoes, being careful not to damage them. Harvest potatoes as needed, or wait until the entire crop is ready for harvest.
Enjoying Your Homegrown Potatoes: Congratulations! You’ve successfully grown potatoes in containers at home with just one potato. Whether you roast them, mash them, or enjoy them in a hearty potato salad, there’s nothing quite like the taste of freshly harvested, homegrown potatoes. Get creative in the kitchen and savor the fruits of your labor.
Growing potatoes in containers at home is a fun and rewarding gardening project that anyone can enjoy, regardless of space limitations. With just one potato as a starter, you can harvest a bountiful crop of delicious potatoes right from your own backyard or balcony. So why wait? Grab a potato, grab a container, and get growing today!
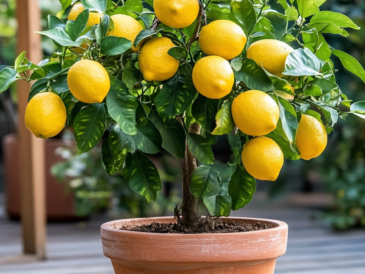
Mastering Lemon Tree Care: Cultivating Potted Lemon Trees for Bountiful Harvests

Embark on a rewarding journey of growing your very own lemon tree in a pot, even as a beginner. This comprehensive guide will walk you through each step with detailed explanations, ensuring your success in nurturing a healthy lemon tree that bears abundant fruits. Let’s dive in and cultivate your green thumb together!
Step 1: Choosing the Perfect Lemon Tree Variety
- Explore beginner-friendly lemon tree varieties ideal for pot cultivation, such as Meyer, Eureka, or Lisbon.
- Consider dwarf or patio lemon tree varieties for compact spaces or indoor growing.
- Opt for disease-resistant lemon tree cultivars to minimize potential challenges and increase chances of success.
Step 2: Creating the Optimal Growing Environment
- Understand the sunlight requirements: place your lemon tree where it can receive at least 6-8 hours of direct sunlight daily, preferably near a south-facing window.
- Ensure proper air circulation to prevent humidity-related issues by placing a small fan nearby or opening windows periodically.
- Select a well-draining potting mix tailored for citrus plants to avoid waterlogging, ensuring the pot has drainage holes at the bottom.
Step 3: Planting Your Lemon Tree with Care
- Choose a container with sufficient drainage holes and a diameter at least 2-3 times larger than the root ball to accommodate growth.
- Gently loosen the roots before planting to encourage outward growth and prevent root binding.
- Position the tree in the center of the pot, ensuring the soil level matches the previous planting depth and gently firm the soil around the roots.
Step 4: Nurturing Your Lemon Tree with Essential Care
- Establish a regular watering schedule, allowing the soil to dry slightly between waterings to prevent root rot.
- Feed your lemon tree with a balanced fertilizer formulated for citrus plants during the growing season, following package instructions for dosage and frequency.
- Monitor the soil moisture using a moisture meter or by checking the soil’s top inch with your finger, adjusting watering frequency based on environmental conditions.
Step 5: Pruning and Shaping Your Lemon Tree
- Remove any dead, damaged, or crossing branches using clean, sharp pruning shears to improve air circulation and light penetration.
- Prune sparingly to maintain the desired shape and size, focusing on removing vertical shoots and water sprouts while preserving the main scaffold branches.
- Conduct light pruning throughout the year to encourage new growth and fruit production, avoiding heavy pruning during the flowering and fruiting seasons.
Step 6: Protecting Your Lemon Tree from Pests and Diseases
- Inspect your lemon tree regularly for signs of pests such as aphids, scale insects, or spider mites, particularly on the undersides of leaves.
- Utilize organic pest control methods such as insecticidal soap, neem oil, or introducing beneficial insects like ladybugs to manage infestations.
- Monitor for common citrus diseases like citrus canker or citrus greening, practicing good sanitation and removing any affected leaves or branches promptly to prevent spread.
Step 7: Encouraging Fruit Production and Harvesting
- Be patient as your lemon tree matures, typically taking 1-3 years before bearing fruit, and continue providing optimal care during this period.
- Hand-pollinate flowers using a soft brush or cotton swab to ensure fruit set in indoor environments where natural pollinators may be limited.
- Harvest ripe lemons when they develop full color and a slight give when gently squeezed, using sharp pruning shears to cut the fruit from the tree without damaging the branches or surrounding foliage.
Congratulations on embarking on your lemon tree growing journey! With these detailed steps, you’re well on your way to cultivating a thriving potted lemon tree that rewards you with delicious fruits. Remember to enjoy the process and celebrate each milestone along the way. Happy gardening!
For more tips and inspiration, continue exploring our website and Let’s grow together