Part 2: Planting and Caring for Your Potato Plants
Step 1: Planting the Seed Potatoes
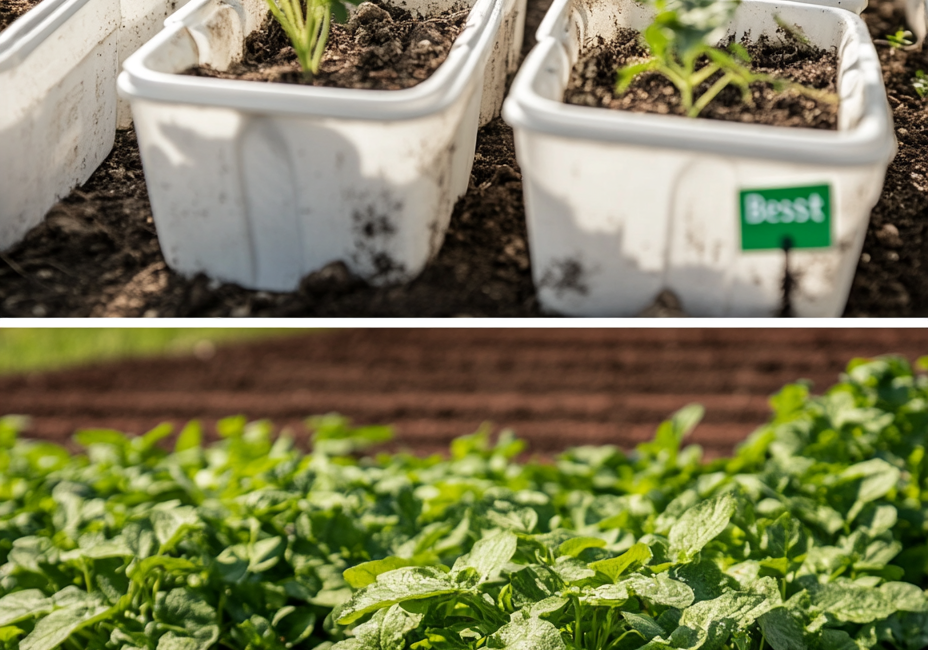
Start by filling the bottom of your container with about 4-6 inches of your prepared potting mix. Place your seed potatoes on top of the soil, spacing them evenly apart with the “eyes” facing up. If your container is large enough, you can plant multiple seed potatoes, but make sure they have enough space to grow.
Once the seed potatoes are in place, cover them with an additional 4-6 inches of potting mix. As the potato plants grow, you’ll need to add more soil to cover the stems—a process known as “hilling”—to encourage the formation of more tubers.
Step 2: Watering
Proper watering is crucial for growing healthy potatoes. After planting, water the container thoroughly to moisten the soil. Potatoes need consistent moisture, but be careful not to overwater, as soggy soil can lead to rot. The goal is to keep the soil evenly moist, but not waterlogged. Check the soil regularly, especially during hot, dry weather, and water as needed.
Step 3: Providing Adequate Light
Potatoes require plenty of sunlight to grow, so place your container in a location that receives at least 6-8 hours of direct sunlight each day. If you’re growing potatoes indoors or in a shaded area, consider using grow lights to supplement natural sunlight. Without enough light, your potato plants will become leggy and produce fewer tubers.
Step 4: Fertilizing
To ensure robust growth, fertilize your potato plants throughout the growing season. A balanced organic fertilizer with equal parts nitrogen, phosphorus, and potassium is ideal. You can apply a granular fertilizer when planting and then supplement with a liquid fertilizer every couple of weeks as the plants grow. Be cautious not to over-fertilize, as too much nitrogen can lead to lush foliage at the expense of tuber development.
Step 5: Hilling the Potatoes
As your potato plants grow, you’ll notice that the stems will begin to emerge from the soil. Once the plants reach about 6 inches in height, it’s time to start hilling. Carefully add more potting mix around the base of the plants, covering the lower stems and leaving only the top few inches of the plants exposed. This encourages the plants to produce more tubers along the buried stems.
Repeat the hilling process every couple of weeks as the plants continue to grow. Aim to keep adding soil until the container is nearly full, with only the top portions of the plants exposed.
Step 6: Pest and Disease Management
Growing potatoes in containers reduces the risk of pests and diseases, but it’s still important to keep an eye out for common issues like aphids, potato beetles, and blight. Regularly inspect your plants for signs of trouble and take action immediately if you spot any problems.
For pests like aphids and beetles, you can use insecticidal soap or neem oil as a natural remedy. To prevent blight, avoid overhead watering and ensure good air circulation around the plants. If you notice any infected leaves, remove them promptly to prevent the disease from spreading.
Step 7: Harvesting Your Potatoes
The moment you’ve been waiting for! Your potatoes are ready to harvest when the plants begin to flower and the foliage starts to yellow and die back. This usually occurs about 10-12 weeks after planting for early varieties.
To harvest, carefully dig into the soil with your hands or a small garden fork to reveal the potatoes. Be gentle to avoid damaging the tubers. If you prefer “new potatoes,” you can harvest them when the plants are still green and flowering. These are smaller, tender potatoes that are perfect for boiling or roasting.
Step 8: Storing Your Harvest
After harvesting, allow your potatoes to dry in a cool, dark place for a few days to toughen their skins. This helps to prepare them for storage. Once dried, store your potatoes in a cool, dark, and well-ventilated space. Avoid storing them in the refrigerator, as cold temperatures can cause the potatoes to develop a sweet taste.
If stored properly, your homegrown potatoes can last for several months, providing you with fresh, delicious potatoes long after the growing season has ended.
Final Thoughts: Enjoy the Fruits of Your Labor
Growing potatoes in containers is a simple and satisfying way to enjoy fresh, homegrown produce, even if you have limited space. By following these eight steps, you’ll be well on your way to a successful potato harvest. So why not give it a try? With just a little effort, you can experience the joy of digging up your own potatoes, knowing that you grew them yourself. Happy gardening!