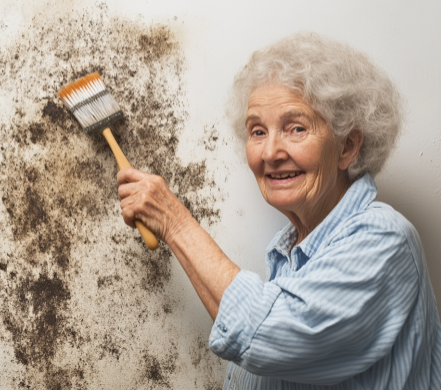
Mold on walls is a common household issue that not only mars the appearance of your home but also poses serious health risks, such as triggering allergies and respiratory problems. It thrives in damp, humid conditions, making areas like bathrooms, kitchens, and basements especially vulnerable. Traditional mold removal methods usually involve intense scrubbing and the use of harsh, often expensive chemicals. However, my nana swears by a simple, nearly effortless trick that has been her go-to for years.
In this article, I’ll share her foolproof method for removing mold from walls effectively, saving you both time and energy.
Why My Nana’s DIY Mold Removal Trick Is a Game Changer
What makes this mold removal method stand out is that it utilizes everyday household ingredients that are not only effective but also safe for your home and the environment. With this technique, you won’t need to spend money on expensive, chemical-laden products that can be harmful to your health and the environment. Plus, the simplicity of this method makes it accessible for everyone, including those who may not have the time or physical capability to scrub walls for hours.
Let’s dive into the details of this easy and effective solution, which proves that sometimes the best remedies are the simplest ones.
The Magic Ingredient: White Vinegar
The secret to this mold removal trick lies in one key ingredient: white vinegar. White vinegar is a natural disinfectant with antifungal properties, making it a fantastic alternative to chemical cleaners. Unlike many commercial products that only mask the problem, vinegar targets the mold at its source, killing 80% of mold species and preventing future growth. Plus, it’s non-toxic, so you can rest assured that it’s safe for children and pets.
Why White Vinegar Works:
- Antifungal: Kills mold spores on contact.
- Non-toxic: Safe for indoor use without harsh fumes.
- Cost-effective: A bottle of vinegar is far cheaper than most commercial mold removal products.
- Prevents regrowth: Vinegar leaves a residue that helps inhibit future mold growth.
Step-by-Step Guide: How to Remove Mold with Vinegar
What You’ll Need:
- White vinegar (preferably undiluted for tougher mold)
- Spray bottle
- Soft cloth or sponge
- Scrub brush (for stubborn mold)
- Baking soda (optional, for added scrubbing power)
Instructions:
1. Prep the Area
First, ensure that the room is well-ventilated. Open windows and doors to allow fresh air to circulate, which will also help reduce the damp conditions mold loves.
2. Apply the Vinegar
Pour undiluted white vinegar into a spray bottle. Spray it generously over the affected moldy area, ensuring full coverage. Let the vinegar sit for at least 30 minutes. The longer it sits, the more effectively it breaks down the mold and inhibits future growth.
3. Wipe Away the Mold
Using a soft cloth or sponge, wipe away the loosened mold. For more stubborn spots, use a scrub brush to gently lift the mold without damaging the wall’s surface.
4. Rinse and Repeat (if needed)
For heavily infested areas, you may need to repeat the process. Simply reapply the vinegar, let it sit, and wipe away the mold until the surface is clear.
5. Optional: Use Baking Soda for Stubborn Mold
If you’re dealing with a particularly tough patch of mold, sprinkle some baking soda onto a damp sponge or brush and scrub the area lightly after the vinegar treatment. Baking soda adds a mild abrasive quality that helps to scrub the mold away more thoroughly.
How to Prevent Mold from Coming Back
Once you’ve successfully removed the mold, it’s essential to take steps to prevent it from returning. Mold thrives in moisture, so controlling humidity levels is crucial.
(Click next page “2” to continue reading!)