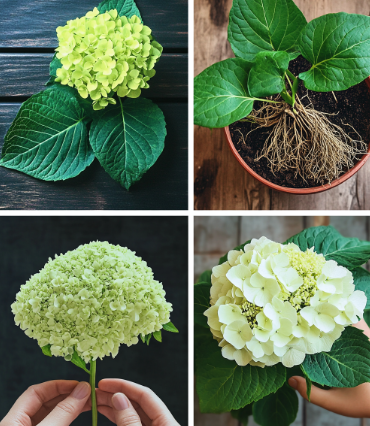
Hydrangeas are beloved for their lush blooms that add vibrant color to gardens. If you’re eager to expand your hydrangea collection or share them with friends, propagation is an easy and rewarding way to do so. Here’s a step-by-step guide to help you multiply your hydrangeas with ease!
1. Understanding Hydrangea Propagation
- Types of Hydrangeas: The most commonly propagated varieties include Bigleaf (Hydrangea macrophylla), Panicle (Hydrangea paniculata), and Smooth (Hydrangea arborescens). While they each have unique characteristics, they can all be propagated using similar methods.
- Propagation Methods: You can propagate hydrangeas through cuttings or layering. Both methods are effective, but cuttings are typically easier for home gardeners.
2. Propagating Hydrangeas from Cuttings
Step 1: Choose the Right Time
The best time to take hydrangea cuttings is in late spring or early summer when the plant is actively growing, with green, flexible stems ideal for rooting.
Step 2: Select and Prepare the Cutting
- Choose a healthy, non-flowering stem about 4-6 inches long. Cut just below a leaf node using sharp, clean pruning shears.
- Remove the lower leaves, leaving only two or three pairs of leaves at the top.
- To reduce water loss, trim large leaves in half.
Step 3: Root the Cutting
- Water Rooting: Place the cutting in a glass of water, ensuring the bottom nodes are submerged. Place it in a bright, indirect light location, changing the water every few days. Roots should form within a few weeks; once they’re 1-2 inches long, the cutting can be planted in soil.
- Soil Rooting: Dip the cut end in rooting hormone (optional), and plant it in a pot filled with a well-draining mix or peat and perlite. Water lightly and cover with plastic to create humidity. Place in a warm, bright location (out of direct sunlight). Check for roots after 2-4 weeks by gently tugging on the cutting.
Step 4: Transplanting
Once roots are well-established, usually after a few months, transplant the cutting into a larger pot or garden area. Choose a location with partial to full shade, depending on the hydrangea type. Water thoroughly and continue to water regularly until established.
3. Propagating Hydrangeas by Layering
Step 1: Select a Low-Growing Branch
Layering involves bending a branch to the ground to encourage it to root while still attached to the parent plant. Choose a flexible branch close to the ground.
Step 2: Prepare the Ground
Dig a shallow trench (2-3 inches deep) where the branch will touch the ground. Loosen the soil, adding organic matter to improve drainage and fertility.
Step 3: Layer the Branch
- Bend the branch into the trench so at least one leaf node touches the soil.
- Remove any leaves that will be buried.
- Cover the node with soil, leaving the tip of the branch exposed above ground. Use a rock or staple to secure it in place.
Step 4: Encourage Rooting
Keep the soil moist throughout the process. It may take several months for roots to form. By the following spring, the branch should have its own root system.
Step 5: Sever and Transplant
Once roots are well-established, sever the branch from the parent plant and carefully dig up the new hydrangea, keeping the root system intact. Transplant to its permanent location and water well.
4. Caring for Your New Hydrangeas
- Watering: Newly propagated hydrangeas need consistent moisture during their first growing season. Water deeply and regularly.
- Mulching: Add mulch around the base to retain moisture and regulate temperature.
- Fertilizing: Use a balanced, slow-release fertilizer in early spring for healthy growth.
- Pruning: Prune according to the hydrangea type to encourage blooming and vigorous growth.
Conclusion
Propagating hydrangeas is a rewarding way to grow your garden or share these beautiful plants with others. Whether you use cuttings or layering, following these steps will help you enjoy stunning hydrangea blooms for years to come.


